![]() Manage your groups from that screen. Here you may view a listing of all groups. You can delete, edit or add groups using
this screen. Create a group when you want to restrict the possibility to submit events to a category only for selected members.
Manage your groups from that screen. Here you may view a listing of all groups. You can delete, edit or add groups using
this screen. Create a group when you want to restrict the possibility to submit events to a category only for selected members.
To access this screen use: Components -> EventList -> Groups
 Super Administrator
  Administrator
  Manager
Select Group(s) by clicking in the checkbox(es) at the beginning of each row.
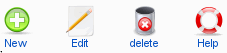
New: Click the 'New' icon to create a new group.
Edit: Click the 'Edit' icon to change the selected group item. You can also do this by clicking the name.
Remove: Click the 'Remove' icon to delete the selected group items.
Help: Click the Help icon to access a relevant Help Screen.
#: The number of the entry in the list.
Checkbox: Select the item or items to be edited or deleted by clicking in this box.
Groupname: The name of the group.
Description: That is the description of the Group.
Search: You may enter text in the "Filter" box to refine the list based on whether the text is found in the title of any event item. Type in any text and press Enter or click the go button.
Drop Down: Select the number of list entries displayed per page [Options between 5 – 100].
Navigation Buttons: Use Start, Previous, Next, and End buttons to navigate between list pages.
Page Indicator: Shows which page is displayed, in the form of page n of n.
Ordering: Click on the tableheader to order the items by name, state or date (depends on the format of the column).